
What You Should Actually Budget for a Gooseneck Hitch
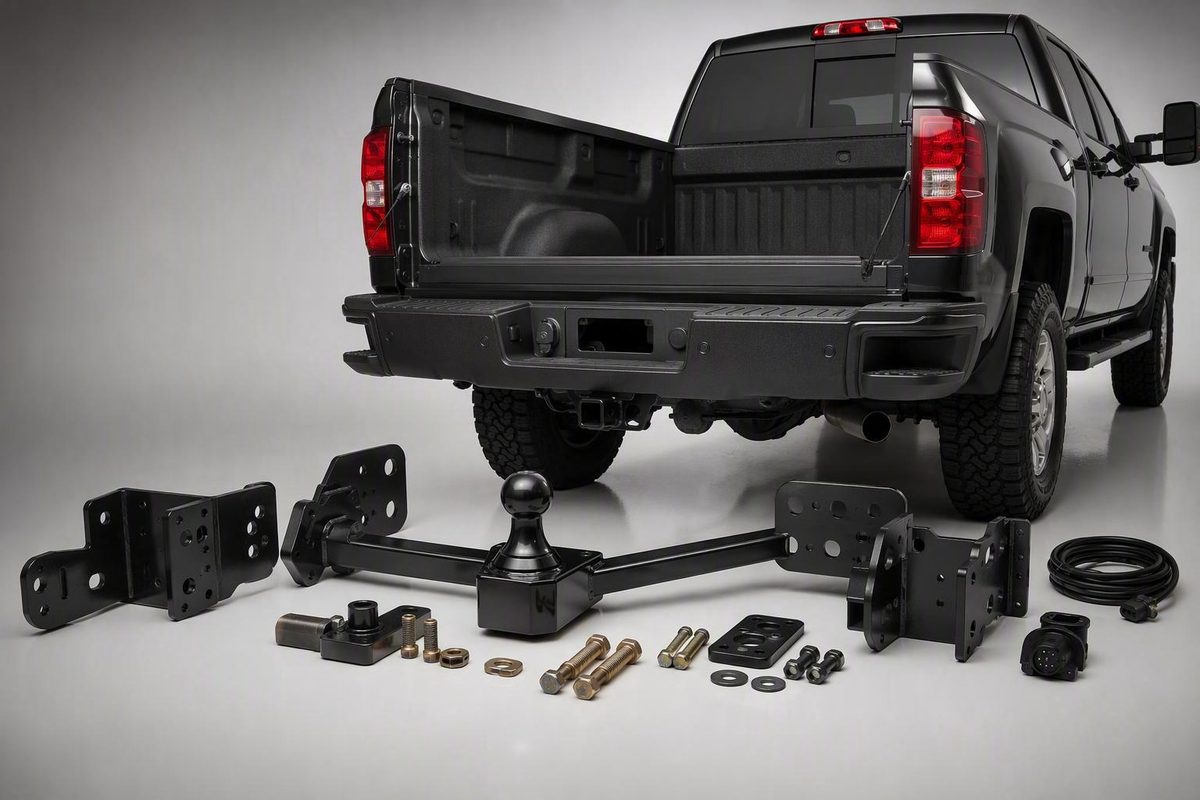
Budget about $700–$2,800 installed; many standard jobs may fall around $700–$2,000 before wiring, accessories, taxes, fees, or difficult work.
By Dale Hutchins · Updated September 4, 2026
Pricing method: This guide synthesizes published installer, retailer, and dealer estimates. The figures are planning ranges—not a transaction-based national average—and should be replaced by an itemized quote for the exact truck and hitch.
The short answer: budget about $700 to $2,800 installed
For initial planning, allow about $700 to $2,800 for a gooseneck hitch and professional installation. This is a synthesis of commercially published estimates, not a statistically reliable national average, guaranteed price band, or substitute for a truck-specific quote. Hitch Corner, a Colorado installer, publishes an installed range of $800 to $2,800, including the hitch and labor. Hitch Corner’s estimate covers parts and professional installation.
A narrower range may be more useful for a standard custom-fit installation. Elliff Trailers estimates $400 to $1,200 for parts and $300 to $800 for labor, implying approximately $700 to $2,000 before optional equipment, extra hardware, taxes, fees, or unusually difficult work. Elliff Trailers publishes the underlying parts and labor estimates.
AutoZone publishes a tighter estimate of approximately $700 to $1,000 for gooseneck parts and installation, with parts at roughly $300 to $800. That lower total illustrates why published estimates are not interchangeable: each may assume a different truck, hitch, labor market, installation procedure, and accessory scope. AutoZone separates its approximate parts and installed-cost figures.
Use the following table as a planning aid, keeping each scope separate:
| Scope | Broad planning amount | What the figure covers |
|---|---|---|
| Hardware only | About $300–$1,200 | Hitch and, depending on the listing, some vehicle-specific mounting hardware; this combines AutoZone’s $300–$800 parts estimate with Elliff Trailers’ $400–$1,200 estimate |
| Labor only | About $300–$800 in one published estimate | Installation labor only; wiring, parts, taxes, freight, accessories, and shop charges may be separate |
| Installed total | About $700–$2,800 | Broad synthesis for the hitch and professional installation; not a verified national average |
| Many standard jobs | About $700–$2,000 | Parts plus labor using Elliff Trailers’ published figures, before optional extras or unusually difficult work |
The only dependable answer is a quote tied to your exact model year, make, model, bed configuration, factory-prep status, hitch model, location, and requested accessories.
For a Chevrolet or GMC owner, “Silverado” or “Sierra” is not specific enough.
When comparing prices, first identify whether each number is:
- Hardware only
- Labor only
- Parts and labor
- Out the door, including taxes and every fee
A $699 product listing and a $1,200 installed quote do not describe the same purchase.
Where the money goes: hitch, labor, and add-ons
The hitch is only one line on a complete invoice. Depending on the truck and quote, the total may include:
- The hitch assembly
- Vehicle-specific brackets, rails, crossmembers, or mounting hardware
- Professional installation labor
- In-bed trailer wiring
- Safety-chain hardware
- Other requested towing accessories
- Shipping or freight
- Sales tax
- Shop supplies
- Retail pricing or dealer markup
- Additional work required by the truck or application kit
Published hardware estimates span roughly $300 to $1,200. AutoZone places parts at about $300 to $800, while Elliff Trailers gives a $400-to-$1,200 range. The difference can reflect hitch design, brand, vehicle application, and what mounting hardware the quoted package includes.
For a dated, product-specific example, etrailer displayed the B&W Turnoverball BWGNRK1020 at $699 on a Q&A published February 24, 2025 and updated October 30, 2025. That was the hitch price—not an installed total—and current pricing may differ. The etrailer page identifies the $699 listing and its product-specific installation estimate.
Professional labor commonly adds several hundred dollars. Elliff Trailers estimates $300 to $800 for labor, while Hitch Corner publishes professional rates of approximately $65 to $150 per hour. Those are commercial estimates rather than universal rates; a local shop may charge outside them or use a flat-rate price instead of multiplying actual clock time by an hourly rate.
A useful budgeting formula is:
Installed budget = hitch price + (quoted labor hours × hourly rate) + wiring + accessories + taxes + shipping + shop fees
Suppose a hitch is offered online for roughly $600 to $700, while a local shop quotes approximately $1,200 installed. It is tempting to label the entire difference as labor, but the shop’s total could also reflect:
- A different selling price for the hitch
- Procurement and compatibility checking
- Missing or additional installation hardware
- Taxes and shop supplies
- Workmanship responsibility
- Time spent resolving a defective or incorrect component
- A different installation scope
A 2022 owner discussion reported quotes near $1,200 for a hitch available online for approximately $600, but participants also noted that product markup could account for part of the difference. Those figures are historical anecdotes, not current market benchmarks. The Duramax forum discussion illustrates why an online price and installed quote require itemized comparison.
In-bed seven-way wiring is a common optional line item because it can make the trailer connection more convenient. It is not automatically required for every project. The same applies to locks, brake-control work, supplemental safety-chain components, offset components, and other accessories. Ask whether each proposed item is required for the selected combination or simply optional.
Buying the hitch from the installing shop may cost more than ordering from a high-volume online retailer. Get those terms in writing before ordering.
Three realistic installation scenarios
These scenarios are illustrations, not quotes, promises, or universal prices. They show how truck preparation, hitch choice, labor, and extra work can change the total.
1. Factory-prepped truck near the lower end
A truck with compatible factory gooseneck preparation may need fewer aftermarket mounting components and less installation work than a truck starting without preparation. If the remaining hardware is near the lower end and labor is limited, the project may land toward the bottom of the broad $700-to-$2,800 planning range.
There is no universal factory-prep price. “Factory-prepped” can describe different equipment on different trucks, and the remaining ball kit, anchors, wiring, or other components are application-specific. Before accepting a low quote, verify what is already installed and what the proposed package adds.
The important questions are:
- Does the factory package include only mounting points, or also the ball and anchors?
- Is in-bed wiring already present?
- Is the selected hitch or ball kit approved for that factory system?
- Does the quoted labor include inspection and final setup?
- Are taxes and accessories included?
2. Standard custom-fit under-bed installation
Using Elliff Trailers’ published estimate of $400 to $1,200 in parts plus $300 to $800 in labor, the basic arithmetic is:
- Low illustration: $400 parts + $300 labor = $700
- High illustration: $1,200 parts + $800 labor = $2,000
Those calculations exclude optional wiring and accessories, shipping, taxes, fees, and unusual vehicle work. Elliff Trailers also estimates three to five hours for a basic bolt-on under-bed installation.
A product-specific illustration can sit within this standard scenario. Start with the dated $699 BWGNRK1020 example and assume, purely for budgeting, that a local installer quotes two hours at a hypothetical $100 to $150 per hour:
- $699 + (2 × $100) = $899
- $699 + (2 × $150) = $999
The illustrative subtotal is therefore $899 to $999 before tax, wiring, freight, supplies, or other fees. The two-hour input comes from the retailer’s estimate for an experienced installer working with that particular kit; the hypothetical hourly rate is not a quote. Do not apply this calculation automatically to another B&W model, another brand, or another truck.
3. Difficult or expanded installation
A more involved project can move toward the $2,800 upper planning figure when it requires some combination of:
- Additional vehicle-specific brackets or hardware
- In-bed wiring
- Cutting, drilling, or trimming required by the selected instructions
- Restricted frame access
- Corrosion or damaged hardware
- Moving obstructions
- Custom fitment
- More labor than a basic bolt-on estimate assumes
- A higher-priced hitch or higher local labor rate
That does not mean every complicated installation will cost $2,800, nor does it make $2,800 a ceiling. The broad range simply leaves room for projects that do not resemble a clean installation on a compatible factory-prepped truck.
A hypothetical $1,500 quote cannot be judged from the headline total alone. Ask:
- Which exact hitch and application kit are included?
- Is in-bed wiring included?
- Are the ball and safety-chain provisions included?
- How many labor hours are quoted?
- Is labor billed hourly or at a flat rate?
- Does the truck require cutting, drilling, trimming, or extra brackets?
- Are tax, freight, shop supplies, and other fees included?
- Is the written price genuinely out the door?
Only after those questions are answered can the quote be compared fairly with another installer’s offer.
Why the same hitch can cost more on one truck
The truck is part of the installation. Even when two owners purchase similarly priced hitches, their final bills can differ because of:
- Exact model year and vehicle configuration
- Factory gooseneck or fifth-wheel preparation
- Above-bed versus under-bed hitch design
- Frame and bed access
- Corrosion, damage, coatings, or previous modifications
- Local labor rates
- Compatibility of the hitch and application kit
- Cutting, drilling, trimming, or wiring specified for the application
- Additional brackets, crossmembers, or custom work
Factory preparation may reduce the aftermarket hardware and work required, but the remaining components and savings are truck-specific. Do not assume every “puck system,” prep package, or in-bed connector supplies everything needed for the hitch you selected.
An above-bed design may be less involved to install than an under-bed arrangement. Under-bed systems can require positioning crossmembers and a center section around the frame and nearby equipment. That can increase installation time, but it does not prove that every under-bed installation costs more than every above-bed installation.
Procedures also vary sharply by kit. B&W says applicable Turnoverball installations use existing frame holes, require no welding or truck-bed removal, and require a four-inch opening in the bed. B&W describes those installation features on its Turnoverball product page.
That is a manufacturer statement about applicable Turnoverball installations—not a rule for all gooseneck hitches. Another kit may specify different openings, frame drilling, trimming, component removal, or other procedures. The current instructions for the exact part number should control the work.
For a Chevrolet Silverado, identify the following before discussing price or fitment:
- Model year
- Silverado 1500 or HD designation
- Cab and bed configuration
- Drive configuration when the application guide distinguishes it
- Factory gooseneck or fifth-wheel prep status
- Existing bed liner, mat, auxiliary tank, toolbox, or other obstruction
- Exact hitch manufacturer and model
- Vehicle-specific application-kit number
Use the same discipline for a GMC Sierra. A listing that merely says “fits Chevy/GMC” is not enough; match the full truck configuration against the hitch manufacturer’s current application information.
Labor time: why estimates range from two hours to a full day
For broad planning, an experienced installation is often estimated at approximately two to five hours, but no fixed number applies to every truck and hitch. The lower end is supported by a product-specific retailer estimate, while the upper end comes from a broader dealer estimate for a basic bolt-on under-bed installation.
For the B&W BWGNRK1020 specifically, etrailer estimates about two hours for an experienced installer and three to four hours for a first-time installer. The estimate applies specifically to the BWGNRK1020, not every gooseneck hitch.
By contrast, Elliff Trailers estimates three to five hours for a basic bolt-on under-bed installation. Those statements do not necessarily conflict: one concerns a named kit, while the other describes a broader installation category.
Time can vary because of:
- Lift access and working position
- Installer familiarity with the exact kit
- Tool availability
- Restricted fastener access
- Heavy or awkward crossmembers
- Bed-opening measurement and cutting
- Corrosion or damaged hardware
- Additional wiring
- Obstructions that must be moved
- Whether a helper is available
First-time owner accounts range from several hours to a full day. A 2018 forum discussion included a reported five-to-six-hour first installation and advice to reserve a full day, along with much faster reports from owners with favorable tools or lift access. These are anecdotes, not standardized time studies. The Cummins forum discussion documents the wide range of owner-reported installation times.
Do not use an old forum shop rate as current pricing evidence. Labor markets and shop overhead vary, and a rate reported years ago may bear little relation to a current local quote.
The useful question is:
How many labor hours are you quoting for this exact hitch on this exact truck, and what hourly rate or flat-rate charge are you applying?
Also ask whether the estimate includes wiring, moving obstructions, creating the specified bed opening, corrosion treatment, cleanup, torque verification, and final checks.
DIY versus professional installation
DIY installation may eliminate the professional labor charge, but it does not make the work free. The real DIY cost can include tools, workspace, lifting or support equipment, supplies, personal time, and rework if the kit is wrong or a measurement is incorrect.
Read the current instructions for the exact part number before buying tools. Depending on those instructions, a custom-fit under-bed job may call for:
- Vehicle-specific installation instructions
- A suitable drill and the specified hole saw
- Correct sockets, extensions, and wrenches
- A torque wrench covering the specified fastener range
- Accurate measuring and marking tools
- Suitable support equipment for heavy components
- Corrosion treatment for exposed metal
- Task-appropriate protective equipment
- A helper when component handling or the instructions justify one
Do not assume that every installation uses a four-inch hole saw. That dimension is documented for applicable B&W Turnoverball installations, but another kit may specify something different.
Use this decision matrix before choosing DIY:
| Question | DIY is more realistic when… | Professional installation may be more practical when… |
|---|---|---|
| Mechanical experience | You regularly perform frame-mounted accessory work and can follow application-specific instructions | This would be your first substantial truck installation |
| Drilling the bed | You are comfortable locating and creating the opening specified by the instructions | You are uncomfortable making a permanent opening |
| Fastener torque | You have the specified torque equipment and can access each fastener | Access prevents you from applying or verifying the required procedure |
| Component handling | You can support and position the parts using an appropriate method | You would have to improvise while handling heavy or awkward components |
| Workspace | You have a level, protected work area with adequate access | You would be working under poor conditions or severe time pressure |
| Helper availability | Assistance is available if the instructions or handling demands it | You must work alone despite difficult component positioning |
| Time | You can reserve several uninterrupted hours and accept that a first installation may take a full day | The truck must return to service quickly |
| Fitment troubleshooting | You can identify an incomplete kit, wrong application, or installation error | You want one shop responsible for parts selection and workmanship |
B&W provides model-specific documents and videos and says some owners install its hitches themselves, although most use an experienced dealer. B&W also states that its warranty covers only the first installation, so verify the current written terms before installing a used hitch or transferring one between trucks. Review B&W’s application information and installation resources before beginning.
Professional installation is not automatically the correct choice for every owner, and DIY does not produce a fixed saving. A capable owner with the appropriate workspace and equipment may complete a compatible bolt-on kit efficiently. Another owner may spend enough on tools, support equipment, and rework to erase much of the apparent labor saving.
After either DIY or professional work, use the exact kit instructions as the inspection standard. Confirm and document, as applicable:
- Completion of every specified fastening and torque step
- Ball insertion, locking, release, and stowage operation
- Installation of the specified safety-chain attachment provisions
- Trailer-connector operation if wiring was installed
- Removal of drilling debris and metal shavings
- Treatment of exposed metal as directed
- Required clearance around the bed, frame, exhaust, and nearby equipment
- Absence of interference from liners, mats, tanks, or other accessories
- Completion of every manufacturer-specified final check
Keep the instructions, invoice, part numbers, and any installation record with the truck’s maintenance documents.
How to compare installer quotes line by line
A cheap-looking bid may omit wiring, taxes, or required application hardware. An expensive-looking bid may include a more complete scope. Ask each shop to quote the same hitch and work before comparing totals.
Use this checklist:
- [ ] Truck year, make, model, series, cab, bed, and relevant drive configuration recorded
- [ ] Factory gooseneck or fifth-wheel prep status confirmed
- [ ] Exact hitch brand and model stated
- [ ] Exact vehicle-specific application kit or part number stated
- [ ] Quote marked parts only, parts and labor, or out the door
- [ ] Hitch selling price listed
- [ ] Vehicle-specific brackets, rails, crossmembers, and fasteners listed
- [ ] Quoted labor hours stated
- [ ] Hourly labor rate or flat-rate labor charge stated
- [ ] In-bed seven-way wiring included, excluded, or optional
- [ ] Safety-chain hardware included or separately identified
- [ ] Other accessories itemized
- [ ] Shipping or freight itemized
- [ ] Sales tax itemized
- [ ] Shop supplies and other fees itemized
- [ ] Procurement charge or dealer markup separately stated if the shop discloses it
- [ ] Out-the-door total provided in writing
A shop may not disclose its actual margin. If it does not, compare the stated parts selling price against the same exact part number elsewhere rather than assuming the difference is labor.
Then ask:
- Does the factory-prep equipment reduce the required parts or labor?
- Does this installation require a bed opening?
- Does it require frame drilling, trimming, bed removal, welding, or custom fabrication?
- Must a bed liner, spare tire, exhaust component, heat shield, tank, toolbox, or other obstruction be moved?
- Is wiring included in the quoted labor?
- Is the hitch confirmed for the complete truck configuration?
- If I supply the hitch, does the labor price change?
- Who is responsible if a customer-supplied part is incorrect, incomplete, damaged, or incompatible?
- Does customer-supplied equipment change workmanship coverage or warranty handling?
- Are required torque and final function checks included?
- Will installed wiring be tested?
- Will drilling debris be removed?
- Will exposed metal be treated as specified?
- Will I receive the instructions, part numbers, and warranty paperwork?
Obtain multiple itemized quotes using the same hitch model and identical scope. Comparing one shop’s parts-only number with another shop’s tax-inclusive package tells you little. A quote that includes in-bed wiring also cannot be compared directly with one that excludes it.
Historical forum totals can reveal questions owners forget to ask, but they cannot replace a current local quote. Old examples came from different vehicles, regions, hitch models, labor markets, and scopes; some included taxes or in-bed electrical work, while others covered labor alone.
The most useful comparison sheet has one row per cost category and one column per installer. If a shop provides only a headline total, ask what the total includes before treating it as complete.
Check truck ratings and compatibility before paying
Installing a hitch does not replace or override the truck manufacturer’s published towing limits. Patriot Hitches likewise advises owners to observe the vehicle’s towing capacity after installation. Its installation guide treats vehicle compatibility and towing capacity as separate considerations.
Before ordering, check:
- The truck manufacturer’s current owner documentation and towing guide for the exact configuration
- The certification and tire/loading labels on the vehicle
- The hitch manufacturer’s current application guide
- The installation instructions for the exact part number
- The published ratings and compatibility information for the towing-system components
- The trailer’s loaded weight and the load imposed on the truck
- Bed-to-cab, bed-rail, tailgate, and trailer clearance
Do not treat the hitch’s advertised rating as authorization for the truck to tow that amount. Observe every applicable limit published for the truck and selected towing equipment.
Compatibility is equally specific. B&W states that its hitches are designed for particular truck applications and may not transfer to another vehicle. A used center section may appear reusable, but the brackets, frame geometry, bed location, and application hardware can differ.
Bed and cab configuration also affect practical fitment and trailer clearance, especially on short-bed trucks. There is no universal clearance number for every trailer nose, coupler position, offset device, ride height, and bed. Evaluate the complete truck-and-trailer combination using the applicable manufacturer guidance.
Silverado owners who need to identify their bed configuration can consult the Chevy Silverado bed-size guide. That guide is only for identifying bed configuration; it does not establish hitch price, towing capacity, compatibility, or installation procedure.
Frequently asked questions
How much is labor alone to install a gooseneck hitch?
Labor commonly adds several hundred dollars. Elliff Trailers publishes an estimate of $300 to $800, while Hitch Corner gives professional labor rates of approximately $65 to $150 per hour. Actual labor depends on the truck, hitch, local market, vehicle condition, access, and included work.
Ask for the quoted labor hours and hourly rate—or a clearly identified flat-rate charge. Confirm whether wiring, cutting, moving obstructions, cleanup, corrosion treatment, and final checks are included.
How long does professional gooseneck hitch installation take?
A practical planning range is approximately two to five hours for an experienced installer, but it is not universal. The product-specific BWGNRK1020 estimate is about two hours for an experienced installer, while Elliff Trailers estimates three to five hours for a basic bolt-on under-bed installation.
Additional wiring, corrosion, restricted frame access, trimming, difficult hardware, or unfamiliarity with the kit can extend the work. Ask for an estimate tied to the exact truck and part number.
Does installing a gooseneck hitch require drilling or welding?
It depends on the hitch and truck. Many installations require an opening in the bed, while other drilling, cutting, trimming, or component removal is application-specific. Welding is not universal.
For example, B&W says applicable Turnoverball installations use existing frame holes, require no welding or truck-bed removal, and require a four-inch bed opening. Do not generalize that procedure to another kit. Read the current vehicle-specific instructions before buying tools or drilling.
Is it cheaper to buy the hitch online and pay a shop for installation?
Sometimes, but not automatically. An online seller may offer a lower hardware price, while an installer may charge differently for customer-supplied equipment or limit responsibility for compatibility, missing hardware, defects, returns, and warranty handling.
Ask the installer to quote both options:
- A shop-supplied hitch
- A customer-supplied hitch of the exact same model
Compare the parts selling price, freight, tax, labor, fitment responsibility, return costs, workmanship terms, and final out-the-door total—not just the advertised product price.
Can a gooseneck hitch be moved to another truck?
Possibly, but never assume it will fit. Under-bed systems and mounting brackets are commonly application-specific, so a hitch made for one model year or frame configuration may not transfer to another truck. Some components may be reusable with different application hardware; others may not be compatible.
Check the manufacturer’s current application guide and warranty before removal or reuse. B&W states that its warranty covers only the first installation, making it particularly important to verify the written terms before buying a used hitch or transferring one.
A practical buying sequence
Use this order to avoid comparing incompatible prices:
- Identify the exact truck configuration and factory-prep status.
- Select a hitch confirmed for that application.
- Read the current installation instructions.
- Decide which wiring and accessories are actually needed.
- Obtain multiple itemized quotes for the identical hitch and scope.
- Compare the complete out-the-door total rather than the headline parts price.
- Verify the truck’s published limits and the compatibility of the towing equipment before use.
Budget approximately $700 to $2,800 installed as a broad planning range—not a verified national average, promise, or ceiling. Many standard jobs may fall around $700 to $2,000 before optional extras, while truck-specific hardware, labor, wiring, taxes, fees, and installation difficulty can move the final price in either direction.
Whatever hitch you install, the truck manufacturer’s published limits remain controlling.